Hi there! Today I’m back with another wonderful weapon tutorial! Today I am going to show you how to stream texture variants for your weapons!
If you have not read my Add-On weapon tutorial, you can find that here: [HOW TO] Stream Add-on Weapons
After you have your Add-On weapon made, you’re ready to start!
Step 1: Preparing Files
You will need to make/import a texture to use! For this tutorial, I will be using an AWP texture pack made by RkrdM
So let’s see the difference;
BEFORE
AFTER

Once all is done, import your texture into the weapons/components .YTD.
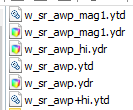
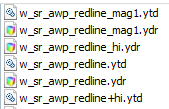
After you are done messing with its textures, THE FILES MUST BE RENAMED!
ORIGINAL FILES
MODIFIED FILES
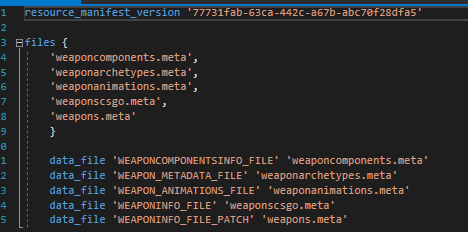
Step 2: Setting up Weapons.meta
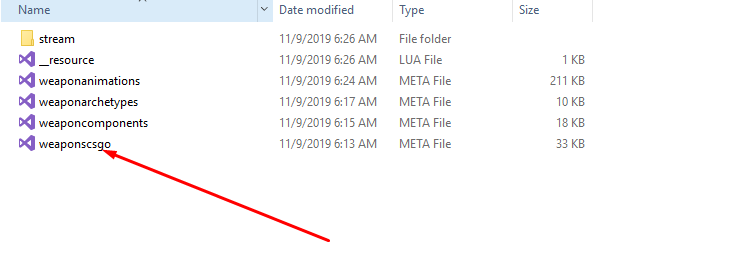
Now we will dive into our Weapons.meta! (In this tutorial, mine is named weaponscsgo.meta)
You will scroll down to the attachments section of your weapon in the Weapons.meta
if the AttachBone gun_root section does not exist, make it as shown below. You will list your texture variant component’s name (will be used later) and define whether the component is default on the weapon or not.

Step 3: Setting up WeaponArchetypes.meta
This is where you have to identify the model you are streaming, otherwise nothing will show.

Step 4: Setting up Weaponcomponents.meta
Now we get to setting up the component itself. This one, I will have typed down below:
<Item type="CWeaponComponentVariantModelInfo">
<Name>COMPONENT_AWP_VARMOD_REDLINE</Name> --Texture Name Here
<Model>W_SR_awp_redline</Model> --Model Name Here
<LocName>WCT_INVALID</LocName> --DONT CHANGE
<LocDesc>WCD_INVALID</LocDesc> --DONT CHANGE
<AttachBone /> --Yes, nothing is supposed to be here
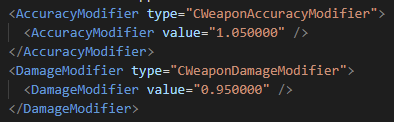
<AccuracyModifier type="NULL" /> --if you want, NUMBER
<DamageModifier type="NULL" /> --if you want, NUMBER
<bShownOnWheel value="false" /> --DONT CHANGE
<CreateObject value="false" /> --DONT CHANGE
<HudDamage value="0" /> -- If it changes anything
<HudSpeed value="0" /> -- If it changes anything
<HudCapacity value="0" /> -- If it changes anything
<HudAccuracy value="0" /> -- If it changes anything
<HudRange value="0" /> -- If it changes anything
<TintIndexOverride value="2"/> -- if you want the tint override to be different
<ExtraComponents> -- Identify the other component's texture variants
<Item> --Ex. This changes the magazine's texture
<ComponentName>COMPONENT_AWP_CLIP_01</ComponentName> --Clip's component name
<ComponentModel>W_SR_awp_redline_mag1</ComponentModel> --Modified Clip Texture Model Name
</Item>
<Item> --another Ex. This changes the scope's texture
<ComponentName>COMPONENT_AT_AWP_SCOPE_LARGE</ComponentName> --Scope's Component Name
<ComponentModel>W_at_awp_scope_large_redline</ComponentModel> --modified scope texture model name
</Item>
</ExtraComponents>
</Item>
Step 5: Resource Set-up & Start!
After all that is done, just set up your resource
Then whatever means you use to spawn weapons, make sure your new component is included & you should be able to use the component! (xnWeapons v1.0.1 - A beautiful and intuitive weapon shop resource. **NOT FOR RP SERVERS** is a good one to use)


Thanks for taking a look! Hope this helps you guys, special thanks to @Disquse for making this possible!