Hi all,
I’m finally able to post this, after sorting out some problems, because I’ve wanted to for a while already.
So, this guide/tutorial will walk you through how to set up visual studio and develop your first resource! I want to thank @Syntasu for his tutorial here which has helped me too and seems to be one of the few guides around currently, but this onehas some specific things that make it stand out, which you will see in a minute.
This tutorial assumes you have your server set up, which seems like a basic requirement to start developing. See here if you have not.
One-time preparation
You will need to have set up Visual Studio 2017 for this. If you have not yet done this, follow the instructions in the spoiler below before continuing, otherwise continue to "Installing the extension"Visual Studio setup instructions
You should be able to follow this without screenshots.
- First of all, download the Visual Studio installer from here or just look it up on google
- Run it and you’ll see 3 options. Choose Visual Studio Community and click the “Install” button
- In the “Workloads” tab, choose “.NET Desktop Development”
- Click install on the bottom right
That’s it. Let it install and you’re done with this step. Just follow the wizard that lets you choose a UI style, optionally choose “Visual C#” in the Development Settings dropdown.
Once that’s done, let’s get to the one-time set up, which is quite easy and straightforward:
Installing the extension
This is what makes this guide stand out from the other guides: the template extension. I will update it to make it even easier and to use NuGet, but for now, it’s about as easy as it can get.
-
Download the Visual Studio 2017 extension: FiveMResourceCreatorWizard.vsix
-
Double-click it to install:
2.1. Make sure “Visual Studio 2017” is checked in the prompt that shows up
2.2. Click “Install”. If it’s waiting for processes to shut down, close Visual Studio or just click “End tasks” -
Open up Visual Studio 2017
-
From the toolbar select Tools > Extensions and Updates and verify that “FiveM Resource Creator Extension” is there. If it’s not, start again at step 1.
Locating your CitizenFX DLLs
This might be the hardest part of the tutorial, and I will make it easier later so that you only need to extract a server DLL and the client DLL will be loaded through NuGet.
Copy both these files to a directory of your choosing. Make sure you know where though, because you are going to need it later:
-
/citizen/clr2/lib/mono/4.5/CitizenFX.Core.dll
This one needs to be renamed to denote that it's the server side library, for example toCitizenFX.Server.dll -
%localappdata%/FiveM/FiveM Application Data/citizen/clr2/lib/mono/4.5/CitizenFX.Core.dll
This one needs to be renamed to denote that it's the client side library, for example toCitizenFX.Client.dll
Actual project creation
Now this is just easy peasy from here.- In Visual Studio, click File > New > Project, or press Ctrl+Shift+N
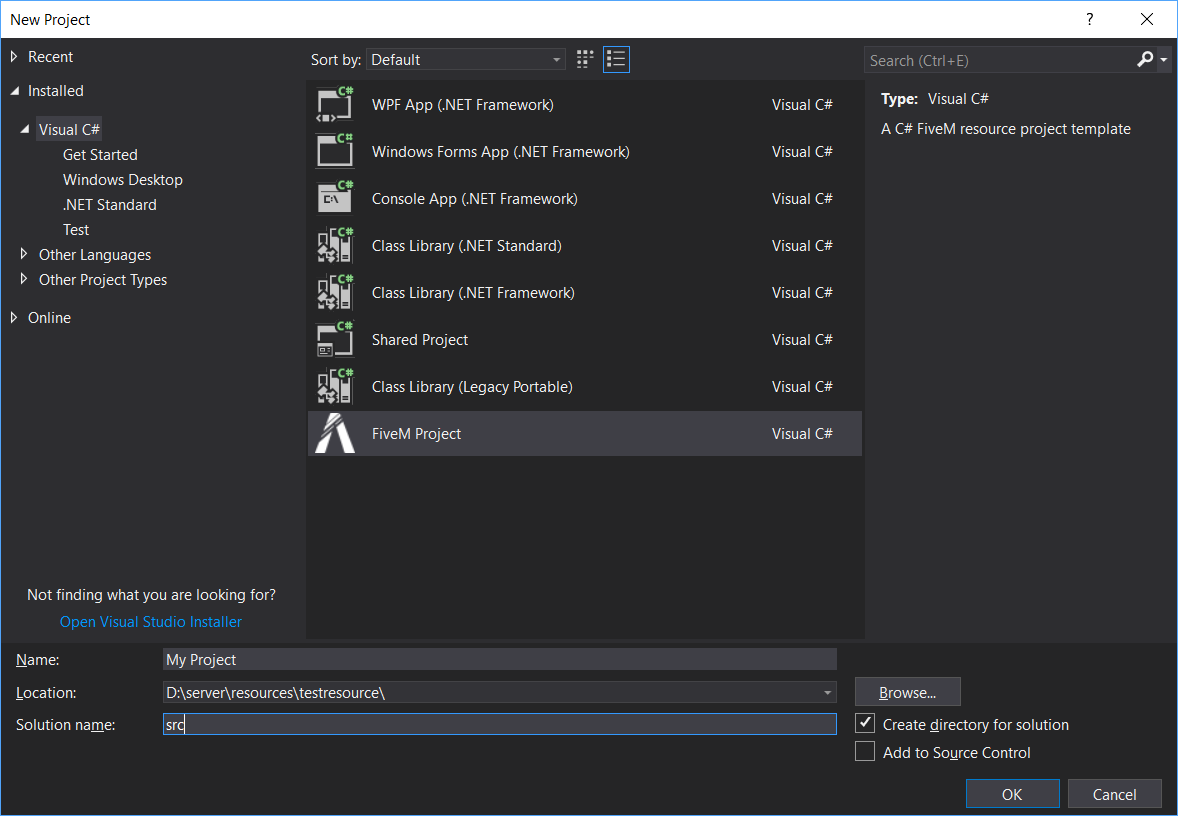
- Select “FiveM Project” as the template, under “Visual C#”
- For “Name”, choose the name you want for your project, obviously. This, however, does not affect the name of the resource, as that is defined by the folder in which it is located. It is best not to have spaces in this name.
- For “Location”, click browse
- Go to your server’s resource folder
- If you already have your resource’s folder, select it. If you don’t, create it and then select it. This folder’s name determines your resource’s name, which you will use to start your resource later on
- Click “Select Folder”
- For “Solution Name”; this is arbitrary. This is going to be the name of your source code folder. I just enter “src” there every time.
- Make sure “Create directory for solution” is checked. Your window should now look something like this:
- Click “OK”
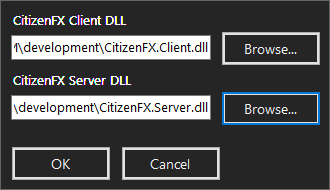
- You are now prompted for a CitizenFX Client DLL and a CitizenFX Server DLL. Click browse, and select the files you copied earlier, for client and server respectively. It should look similar to this:
- Click “OK”. Wait for the project to finish generating.
- This should open:
- Congratulations! Your project has been set up, your __resource.lua has been generated, and build options have been automatically configured so that they build into your resource folder with the correct name!

Exporting and using
- Press ctrl+shift+b or f6 or right click your solution and click “Build”
- Type
start <your resource name>in your f8 console in FiveM.
